Release 8.0.3
A54894-01
Library |
Product |
Contents |
Index |
| Oracle8(TM)
Getting Started for Windows NT Release 8.0.3 A54894-01 |
|
This chapter describes tasks you need to perform if you decide not to perform a migration and instead have Oracle7 and Oracle8 databases co-exist on the same server (in the same Oracle home). It also describes how to migrate the contents of an existing database (either Oracle7 or Microsoft Access) to an Oracle8 database.
Specific topics discussed are:
When you install Oracle8 for Windows NT, you can:
| Additional
Information:
See Oracle8 Installation for Windows NT CD-ROM Insert for information on how to perform a fresh installation of Oracle8 software. |
If you have an existing Oracle7 database(s) on your system and you want to install an Oracle8 database(s), you must decide to:
Consider the following issues before you decide which of the above procedures is most suitable for your requirements.
Most Oracle7 client applications can run on an Oracle8 database. Some applications cannot run on Oracle8 databases unless you upgrade them to versions which support Oracle8 databases. If you have a combination of Oracle7 and Oracle8 applications, you may want to have an Oracle7 database and Oracle8 database co-exist on the same system, until you have time to upgrade all your Oracle7 applications to version 8.
| Note:
Contact your application vendor to check if your third-party applications are supported on Oracle8. |
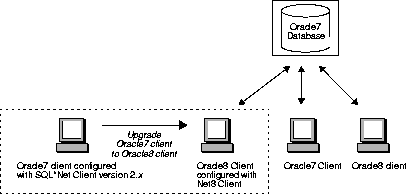
No. If an Oracle7 client needs to connect to a remote Oracle8 database, only SQL*Net Client version 2.x needs to be configured on the Oracle7 client. The Oracle7 client configured with SQL*Net Client version 2.x can connect to the Oracle8 database that uses a Net8 listener without further configuration. Net8 is backwards compatible with SQL*Net version 2.x. The only limitation is that the new network features available with Net8 are unavailable with this connection type. The figure below gives an example of this network configuration.

Yes. If the Oracle7 client needs to connect to a local Oracle8 database, you need to install SQL*Net Client version 2.x, Net8 Client, and Net8 Server on the computer. Note that Net8 Client and Net8 Server are already installed during the installation of Oracle8. You also need to create a service name using SQL*Net Easy Configuration or Oracle Network Manager in the SQL*Net Client version 2.x TNSNAMES.ORA file. The service name can use any of the installed protocol adapters such as TCP/IP, SPX, or Named Pipes to perform local connections.
| Additional
Information:
You can also specify a service name using the LOCAL parameter. See Oracle Networking Products Getting Started for Windows Platforms for information. |
Ensure you specify this service name in the connect string when connecting to the Oracle8 database. Note that the Bequeath protocol adapter is not supported when connecting from an Oracle7 client to an Oracle8 database. The figure below gives an example of this network configuration.

No. If an Oracle8 client needs to connect to a remote Oracle7 database, only Net8 Client needs to be configured on the Oracle8 client. The Oracle8 client configured with Net8 Client can connect to the Oracle7 database that uses a SQL*Net version 2.x listener without further configuration. SQL*Net version 2.x is upwards compatible with Net8. The only limitation is that the new network features available with Net8 are unavailable with this connection type.

Yes. If the Oracle8 client needs to connect to a local Oracle7 database, you need to install both SQL*Net Server version 2.x and Net8 Client on the computer. Note that the Oracle8 client uses the Bequeath protocol adapter by default to connect to an Oracle7 database. The figure below gives an example of this network configuration.

Oracle7 and Oracle8 clients can communicate with Oracle7 and Oracle8 databases. This functionality gives you maximum flexibility when designing your network and deciding when to:
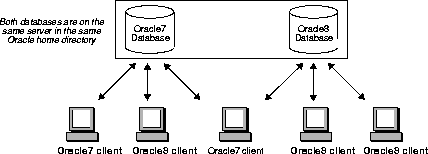
Install an Oracle7 and Oracle8 database on the same server (in the same Oracle home directory) and have both Oracle7 and Net8 clients connecting to both databases. See the section, "Installing an Oracle7 and Oracle8 Database in the Same Oracle Home" for instructions. The figure below gives an example of this network configuration.
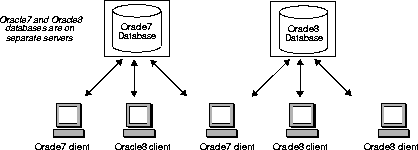
Install Oracle7 and Oracle8 databases on separate servers and have both Oracle7 and Oracle8 clients connecting to both databases. See Oracle8 Installation for Windows NT CD-ROM Insert for information on how to perform a fresh installation of Oracle8 software. The figure below gives an example of this network configuration.
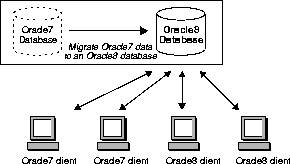
Migrate your Oracle7 data to an Oracle8 database and have both Oracle7 and Oracle8 clients connecting to the Oracle8 database. See the section, "Using Oracle Data Migration Assistant" or the section, "Using the Migration Utility (MIG80)" for instructions. The figure below illustrates this network configuration.
Upgrade some or all of your Oracle7 clients to Oracle8 and migrate your Oracle7 database to an Oracle8 database at a later date. See Oracle Networking Products Getting Started for Windows Platforms for instructions. The figure below illustrates this network configuration.
If you decide to co-exist databases or migrate your database, there are specific networking issues to be resolved. Oracle Installer automatically resolves some of the issues. The Network Administrator may also need to perform some manual tasks.
Oracle7 clients configured with SQL*Net version 2.x should migrate to Oracle8 clients configured with Net8 when their applications are upgraded to version 8. Until client applications upgrade to version 8, clients using SQL*Net Client version 2.x can connect to Oracle8 databases. SQL*Net version 2.x can co-exist with Net8 in the same Oracle home directory.
If you are installing Net8 on the same computer where SQL*Net version 2.x exists, Oracle Installer automatically performs these tasks to enable co-existence:
To use the version 8 listener, you may need to change your network configuration on either the SQL*Net version 2.x or Net8 configurations to prevent a conflict. For example, you may need to change:
You may also need to start the version 8 listener and change the status to Automatic Startup, depending upon your network needs. If you make changes to the listener, you must make changes to client configuration files to reflect those listener changes.
SQL*Net version 2.x uses configuration files from ORACLE_HOME\NETWORK\ADMIN, while Net8 uses files from ORACLE_HOME\NET80\ADMIN by default. If you want SQL*Net version 2.x and Net8 to use configuration files from the same directory, you can set the registry variable TNS_ADMIN.
Oracle7 clients configured with SQL*Net version 2.x should migrate to Oracle8 clients configured with Net8 when their applications are upgraded to version 8.
If you are migrating SQL*Net version 2.x to Net8, Oracle Installer automatically performs these tasks:
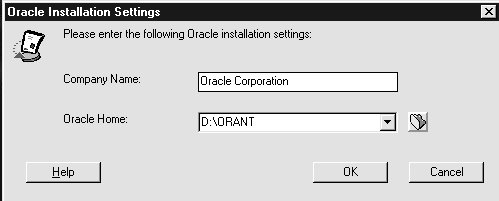
You can install an Oracle8 database in the same Oracle home as an existing Oracle7 database and run both simultaneously. In the following instructions, an Oracle release 7.3.3.0.0 starter database called ORACLE with a SID of ORCL is already installed in D:\ORANT. Now, create an Oracle release 8.0.3.0.0 database called PROD with a SID of PRD1 in D:\ORANT.
| Note:
The use of multiple Oracle homes is not supported on Windows NT or Windows 95. You must install both databases into the same directory, for example, D:\ORANT. |
To install an Oracle8 database into the Oracle home of an existing Oracle7 database:
| Additional
Information:
See Oracle8 Installation for Windows NT CD-ROM Insert for complete installation instructions. |
The Oracle Installation Settings dialog box appears:
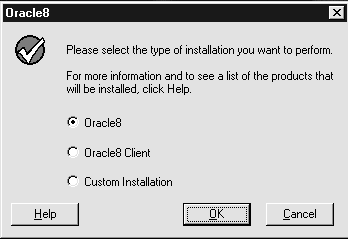
The Oracle8 dialog box appears:
The Data Migration dialog box appears indicating that Oracle Installer has detected an earlier version of the database. You are asked if you want to migrate your Oracle7 database to release 8.0.3.0.0 using Oracle Data Migration Assistant.

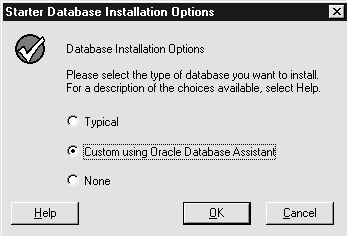
The Starter Database Installation Option dialog box appears:
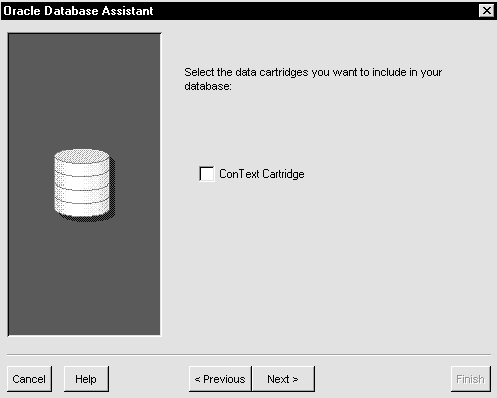
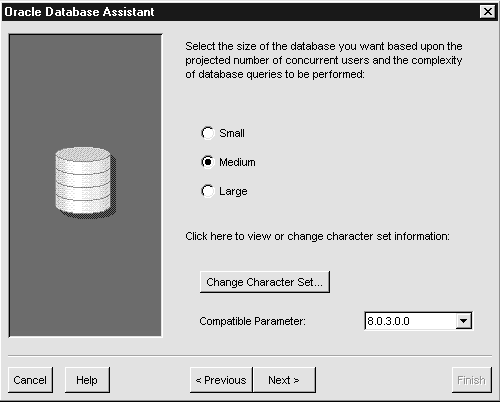
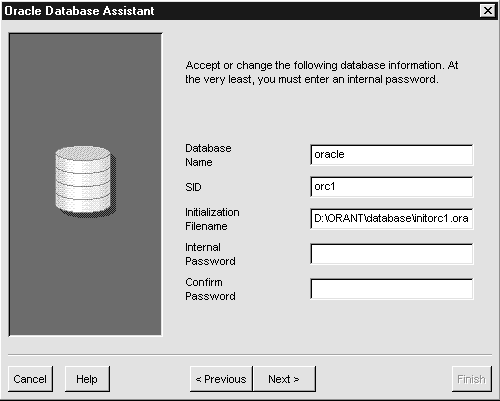
The above screen by default shows information for the existing 7.3.3.0.0 database. You must change the information in this screen to reflect your requirements for the 8.0.3.0.0 database. See the following table for example information you can enter in this screen.
|
Database Name |
PROD |
|
SID |
PRD1 |
|
Initialization Parameter File |
D:\ORANT\database\initprd1.ora |
| Note:
When you change the information in the initialization parameter file field, your new file name is reflected in all file name fields in subsequent screens of this assistant. |
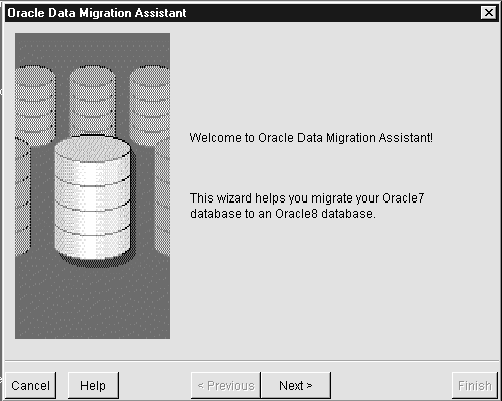
Oracle Data Migration Assistant helps you migrate data from an Oracle7 database to an Oracle8 database. During installation of Oracle8, you are prompted to migrate a database with this wizard if Oracle Installer detects that a database exists on your system. If you do not want to migrate a database during the installation process, you can choose to use this wizard at a later date.
| Additional
Information:
See Oracle8 Installation for Windows NT CD-ROM Insert for information on how to install Oracle Data Migration Assistant. |
Before you use this wizard, ensure the Oracle7 database to be migrated meets these requirements:
To migrate a database using Oracle Data Migration Assistant:
The Oracle Data Migration Assistant welcome screen appears:
| Additional
Information:
Click Help to access the online documentation. |
This section describes how to use the Migration Utility (MIG80) to migrate your Oracle7 database to an Oracle8 database. While following these instructions, you are frequently asked to refer to Oracle8 Server Migration for additional migration information.
If you are migrating from Oracle7 version:
| Note:
SVRMGR30 is the version of Server Manager used for Oracle8. |
The steps to migrate a database using MIG80 are:
Step 1: Shut Down the Oracle7 Database
Step 2: Back up the Oracle7 Database
Step 3: Prepare the Oracle7 Database for Migration
Step 5: Migration Procedure for Oracle7
Step 6: Migration Procedure for Oracle8
Step 8: Remove Oracle7 Software (Optional)
C:\> SQLDBA71 MODE=LINE
C:\> SQLDBA72 MODE=LINE
C:\> SVRMGR23
SVRMGR> CONNECT INTERNAL/PASSWORD
SQLDBA> ALTER USER SYS DEFAULT TABLESPACE SYSTEM TEMPORARY TABLESPACE
SYSTEM;
SQLDBA> ALTER TABLESPACE SYSTEM ADD DATAFILE
`ORACLE_HOME\RDBMS71\SYS2SID.ORA' SIZE 50 M;
SVRMGR> SHUTDOWN
| Note:
Do not use SHUTDOWN IMMEDIATE or SHUTDOWN ABORT. |
| Note:
If the database is not shut down before migration starts, MIG80 stops and issues an error message during "Step 5: Migration Procedure for Oracle7". |
After a clean shutdown of the Oracle7 database, execute the following sequence of commands to create a complete database backup:
The following tasks must be performed to prepare the Oracle7 database for migration before you start the migration procedure.
Install MIG80 from the Oracle8 for Windows NT CD-ROM disc into the Oracle7 Oracle home directory, as follows:
| warning:
You must select the Oracle7 Oracle home directory. If you use a new Oracle home, the Oracle7 software will become unusable, and migration will not be possible. |
The Software Asset Manager window appears.
| Note:
MIG80 will not be able to connect to the Oracle7 database in "Step 5: Migration Procedure for Oracle7" if SQL*Net version 2.3 is not installed. Ensure that this product is installed, if not, install it from the Oracle8 for Windows NT CD-ROM disc. |
| Note:
Do not start the Oracle7 source database. MIG80 starts it as part of its processing. |
C:\> NET START OracleServiceSID
C:\> MIG80
C:\> MIG80 PFILE =ORACLE_HOME\RDBMS71\INITSID.ORA
| Additional
Information:
Enter MIG80 help=yes at the Server Manager prompt for a complete list of parameters that can be included with the MIG80 command. |
C:\> NET STOP OracleServiceSID
C:\> NET STOP OracleStartSID
C:\> ORADIM7x -DELETE -SID SID
where x is 1, 2, or 3 depending upon which Oracle7 version you are migrating.
C:\> ORADIM80 -NEW -STARTMODE AUTO -PFILE
`ORACLE_HOME\DATABASE\INITSID.ORA'  -SID SID -INTPWD PASSWORD -MAXUSERS
USERS -STARTTYPE SRVC
where PASSWORD is the password for the new instance and users is the maximum number of users who can be granted SYSDBA and SYSOPER privileges.
C:\> NET START OracleServiceSID
C:\> SVRMGR30
SVRMGR> CONNECT INTERNAL/password
SVRMGR> STARTUP NOMOUNT
| Warning:
Starting in any other mode will corrupt the database! |
SVRMGR> ALTER DATABASE CONVERT;
All data files that are online are converted to Oracle8 format, and a new control file is built.
| Note:
Successful execution of this command is the point of no return to Oracle7. |
| warning:
If an error occurs during this step, you must correct the condition(s) that caused the error(s). See Oracle8 Server Migration and run the migration again by restarting at Step 1 of section, "Step 5: Migration Procedure for Oracle7". |
SVRMGR> ALTER DATABASE OPEN RESETLOGS;
All rollback segments that are online when the Oracle8 database is opened are opened also and converted to the new Oracle8 format.
SVRMGR> SPOOL CATOUT.LOG
SVRMGR> @%ORACLE_HOME%\RDBMS80\ADMIN\CAT8000.SQL
where %ORACLE_HOME% represents your drive letter and Oracle home directory.
SVRMGR> @%ORACLE_HOME%\DBS\PUPBLD.SQL
SVRMGR>SPOOL OFF
To create additional data dictionary structures, see Oracle8 Server Reference for a complete list and description of available scripts.
| Caution:
Check the spool file (for this example, CATOUT.LOG) and verify that CAT8000 compiled every package or procedure successfully. |
SVRMGR> SHUTDOWN NORMAL
| Note:
Do not use SHUTDOWN IMMEDIATE or SHUTDOWN ABORT. |
The Oracle7 database has now been migrated to the Oracle8 database and is ready for use.
The Database Administrator can run MIG80 multiple times and still return to the Oracle7 database. However, running MIG80 automatically eliminates the Oracle7 database catalog views. Therefore, to return to the Oracle7 database after MIG80 has run, the Oracle7 database catalog views must be restored by running the Oracle7 CATALOG.SQL script.
| Additional
Information:
See Oracle8 Server Migration for information on cancelling the migration. |
| Note:
MIG80 upgrades Oracle7 version 7.1, 7.2, and 7.3 databases to version 8.0. If the migration is run but cancelled before the conversion to Oracle8, the Oracle7 database is left with a dictionary that is apparently version 8.0. See Oracle8 Server Migration for information on how to downgrade from 8.0 to 7.1, 7.2, or 7.3 if required. |
You may remove Oracle7 software if you did not perform "Step 7: Cancel the Migration" and have successfully migrated to Oracle8.
To remove Oracle7 software:
Oracle Installer warns you of any product dependencies that might cause problems if particular products are removed, and prompts you to confirm the de-installation.
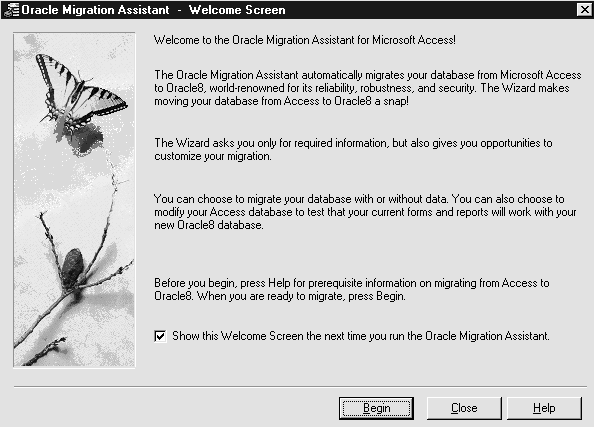
Oracle Migration Assistant for Microsoft Access helps you migrate data from a Microsoft Access database to an Oracle8 database. Specifically, Oracle Migration Assistant for Microsoft Access:
Oracle Migration Assistant for Microsoft Access can migrate several types of Microsoft Access databases, including:
Oracle Migration Assistant for Microsoft Access can be used to migrate both 16-bit Access 2.0 databases and 32-bit Microsoft Access 7.0 databases.
To prepare a Microsoft Access database for migration:
To migrate a database using Oracle Migration Assistant for Microsoft Access:
The Oracle Migration Assistant for Microsoft Access welcome screen appears:
| Additional
Information:
Click Help to access the online documentation. |
This section lists known problems and restrictions with Oracle Migration Assistant for Microsoft Access.
|
Copyright © 1997 Oracle Corporation. All Rights Reserved. |
|