Release 8.0.3
A54632_01
Library |
Product |
Contents |
Index |
| Oracle8
Client Getting Started for Windows NT and Windows 95 Release 8.0.3 A54632_01 |
|
This chapter describes post-installation configuration tasks for Oracle8 Client for Windows NT and Windows 95.
Specific topics discussed are:
Net8 is the Oracle networking software that enables applications running on client workstations to access, modify, share, and store data on the Oracle8 database. To configure Net8 so that your client workstations and Oracle8 database can communicate, you must use Oracle Net8 Assistant to create and modify server and client configuration files. Oracle Net8 Assistant is automatically installed when you select the following:
| Additional
Information:
See Oracle Net8 Getting Started for Windows NT/95 and the Net8 Administrator's Guide for instructions on using Oracle Net8 Assistant to configure your client/server network. |
Oracle Enterprise Manager works with the Oracle Intelligent Agent (installed on the Oracle8 database server) to perform database administration from a single console. Oracle Enterprise Manager is installed on a console workstation, a Windows NT or Windows 95 client.
The Oracle Intelligent Agent is installed on the Oracle8 database. The Oracle Intelligent Agent is responsible for managing and completing tasks requested from the console workstation by the Oracle Enterprise Manager. Once installed, the Oracle Intelligent Agent:
If you are connecting to a Windows NT database, follow all of the steps below. If you are connecting to a non-Windows NT database, complete steps 4 and 5 only.
Perform the following configuration tasks after installing the Oracle Enterprise Manager on a client Windows NT or Windows 95 console workstation and the Oracle Intelligent Agent on your Oracle8 Enterprise Edition for Windows NT machine:
Each of these tasks is described in the sections that follow.
Before configuring Oracle Enterprise Manager, ensure that the Oracle8 database services OracleServiceSID, OracleTNSListener80, and OracleAgent are started on the server. The Oracle Intelligent Agent automatically locates the services on the computer where it resides and passes this information to the Oracle Enterprise Manager console.
To start the Oracle Services:
C:\>NET START SERVICE
You need to have a user account with DBA (database administrator) privileges set up on the Oracle8 repository database. Oracle Enterprise Manager places its repository in the default tablespace of the user account to which you are connected when creating the repository. Because of this, Oracle Corporation recommends that you create a new user account so that the repository can be created in its own tablespace. It is also recommended that you create a new tablespace and the newly-created user be customized to use this tablespace as its default tablespace.
To create a repository user account on the Oracle8 repository database:
C:\> SVRMGR30
SVRMGR> CONNECT SYSTEM/MANAGER
SVRMGR> CREATE TABLESPACE REPOSIT_TABLESPACE DATAFILE 'path\DATAFILE' SIZE
XM;
where X is the tablespace size in megabytes; 20 MB is a good starting place.
SVRMGR> CREATE USER USERNAME IDENTIFIED BY PASSWORD
2> DEFAULT TABLESPACE REPOSIT_TABLESPACE;
SVRMGR> GRANT DBA TO USERNAME IDENTIFIED BY PASSWORD;
SVRMGR> EXIT
Exiting Server Manager closes the database connection.
After a repository user account is created, an NT user account with the same user name as the repository user account must be created on the Oracle8 Client for Windows NT and Windows 95 server.
To create a user account on the Oracle8 Client for Windows NT and Windows 95 server:
The User Manager window appears: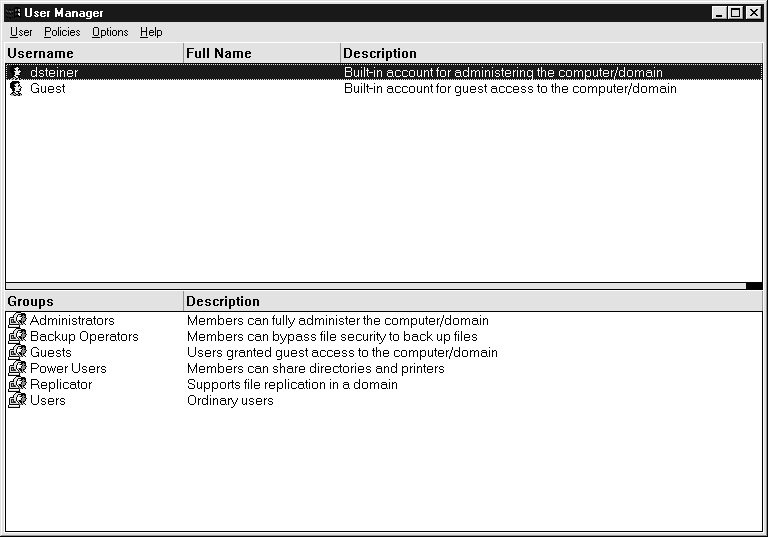
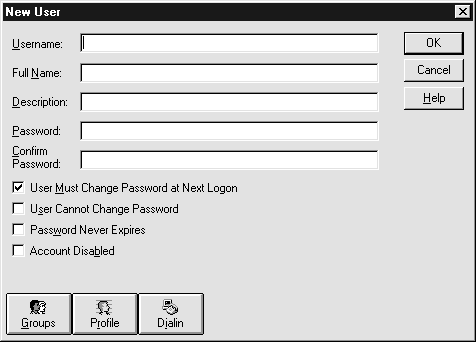
The New User dialog box appears:
The Group Memberships dialog box appears:
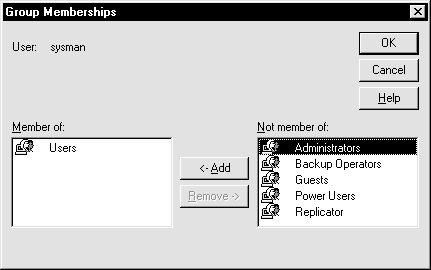
Administrators is added to the Member of list box.
The user is added and the User Manager window re-appears.
The User Rights Policy dialog box appears:
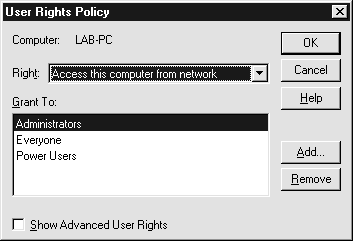
If Users does not exist, create it:
The Add Users and Groups dialog box appears:

Users appears in the Grant To list box.
The User Manager window re-appears.
If Oracle Enterprise Manager is installed on a Windows 95 or Windows NT client console, you must configure the client machine so it can connect to the Oracle8 repository database. Use the Oracle Net8 Assistant to configure your network.
If Oracle Enterprise Manager is installed on the machine where the Oracle repository database is installed, you do not need to configure your network.
| Additional
Information:
See Oracle Net8 Getting Started for Windows NT/95 and the Net8 Administrator's Guide for complete information about configuring your network. |
Before you can use Oracle Enterprise Manager, you need a repository on the console workstation where Oracle Enterprise Manager will run. The repository is a set of base tables in a database that contains status and environment information for your managed databases. A separate repository must be created for each user wanting to use Oracle Enterprise Manager.
The Oracle Enterprise Manager console workstation must also discover network services, such as databases, listeners, and nodes, to populate the Oracle Enterprise Manager Navigator tree. In addition to discovery, the Oracle Enterprise Manager must also be able to manage these services for the Job Scheduling and Event Management systems. This can be achieved with the Discovery Wizard.
When the agent starts up and is explicitly requested by the Oracle Enterprise Manager with the Navigator Discovery feature, the agent passes information from the Oracle Enterprise Manager console to populate the Navigator tree.
To create a repository on the console workstation:
The Oracle Enterprise Manager Repository Login Information dialog box appears:
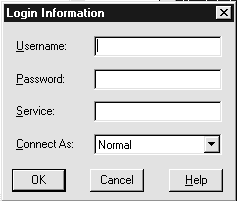
The Oracle Repository Manager window appears, prompting you to
build the repository: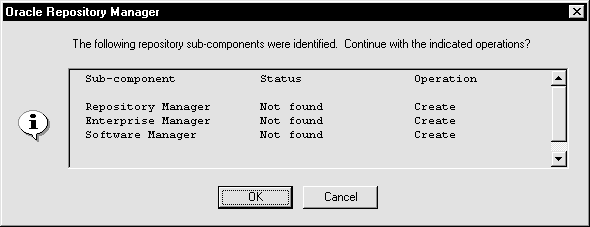
The repository is built.
The Discover New Services Wizard appears: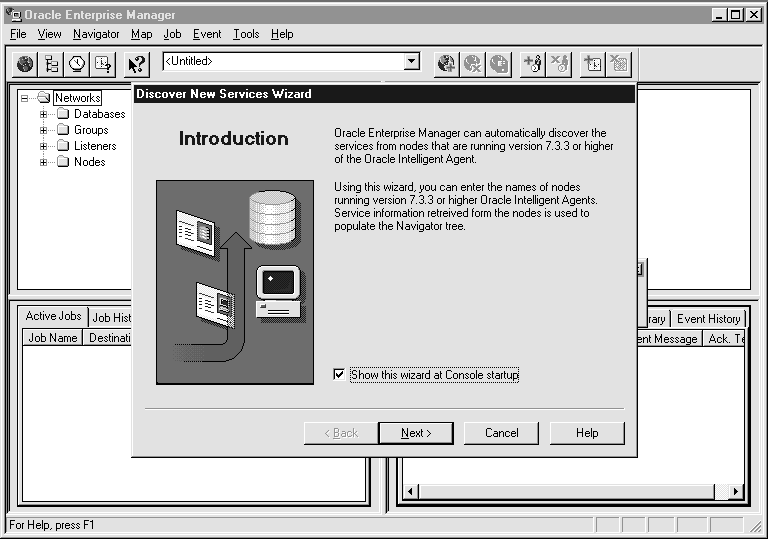
Services are discovered when you see the dialog box below with a status
of Discovered: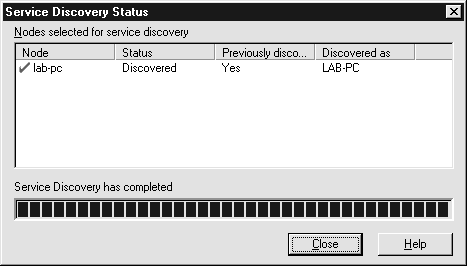
The Oracle Enterprise Manager Console appears: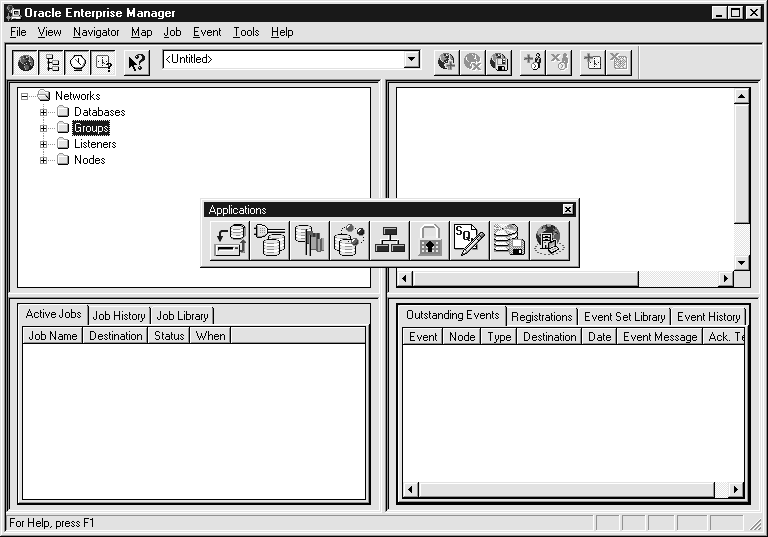
|
Copyright © 1997 Oracle Corporation. All Rights Reserved. |
|