Release 8.0
A53634-01
Library |
Product |
Contents |
Index |
| Oracle
Pro*C/C++(TM) Getting Started for Windows Platforms Release 8.0 A53634-01 |
|
This appendix describes how to integrate Pro*C/C++ into the Microsoft Visual C++ development environment. It includes:
| Additional
Information:
For additional information about integrating Pro*C/C++ and other applications into the C++ environment, refer to your Microsoft documentation. |
Use the following steps to integrate Pro*C/C++ into the Microsoft Visual C++ version 5.0 environment:

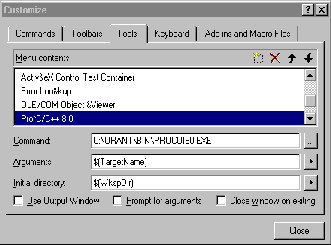
In the Menu contents panel, double click on the edit field at the bottom of the content list. Enter Pro*C/C++ 8.0.
In the Command field, enter ORACLE_HOME\BIN\PROCUI80.EXE. For the Arguments field, enter $(TargetName) and in the Initial directory field, enter $(WkspDir).
When you select Pro*C/C++ 8.0 from the Tools menu, the $(TargetName) argument is used to pass the name of the current development project to Pro*C/C++. Pro*C/C++ then opens a precompile project with the same name as the opened project, but with a .pre extension in the project directory.
Use the following steps to fully integrate Pro*C/C++ within Microsoft Visual C++ Version 5.0 project. Microsoft Visual C++ maintains the dependency and precompile files if needed. All the precompiler errors and warnings are displayed in the output box where Microsoft Visual C++ displays compiler and linker messages. You do not have to precompile a file separately from the Microsoft Visual C++ build environment. More importantly, Microsoft Visual C++ maintains the dependency between .c and .pc files.
In the following steps, SAMPLE.PC is a sample source file that when precompiled, creates SAMPLE.C.
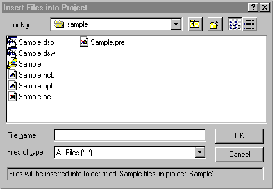
1. Create a New project and add sample.pc into the project using Insert menu option then Files into Project in the menu list.

2. Add SAMPLE.C into the Sample project using Insert menu option then Files into Project in the menu list.
| Note:
Currently, SAMPLE.C does not exist, therefore Microsoft Visual C++ displays a message box prompting, "This file does not exist. Do you want a reference added to the project anyway?" Click Yes. |
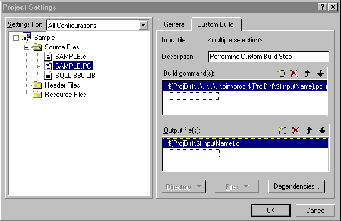
3. Click on the Build menu option and select the Settings option. Click on the Custom Build tab. In the Settings For window, and Select All Configurations. Then select SAMPLE.PC.

4. In the Build command(s) field, enter:
$(ProjDir)\..\..\..\..\bin\proc $(ProjDir)\$(InputName).pc
include=$(ProjDir)\..\..include include="$(MSDEVDIR)\..\vc\include"
5. In the Output Files field, enter:
$(ProjDir)\$(InputName).c
6. Choose OK to accept the settings.
7. Add SQLLIB80.LIB to your project.
8. Include Pro*C/C++ header files directory by first selecting the Tools option from the menu bar and then choosing Options. Click on the Directories tab and select Include Files from the Show directories for list box. Add the directory, %ORACLE_HOME%\PRO80\C\INCLUDE where %ORACLE_HOME% must be replaced by your designated Oracle home directory. Then click OK.
|
Copyright © 1997 Oracle Corporation. All Rights Reserved. |
|