Release 8.1.5
A67766-01
Library |
Product |
Contents |
Index |
| Oracle Advanced Security Administrator's Guide Release 8.1.5 A67766-01 |
|
This chapter tells you how to configure Oracle8i for use with RADIUS (Remote Authentication Dial-In User Service).
This chapter covers the following topics:
RADIUS (Remote Authentication Dial-In User Service) is a client-server security protocol most widely known for enabling remote authentication and access. The Oracle Advanced Security option uses this emerging standard in a client-server network environment.
You can enable your network to use any authentication method that supports the RADIUS standard--including token cards and smartcards--simply by installing and configuring the RADIUS adapter. Moreover, when you use RADIUS, you can change your authentication method without modifying either the Oracle client or the Oracle server.
From the user's perspective, the entire authentication process takes place seamlessly and transparently. When the user seeks access to an Oracle server, the Oracle server, acting as the RADIUS client, notifies the RADIUS server. The RADIUS server then:

In an Oracle environment (Figure 3-1), the Oracle server acts as the RADIUS client; it passes information between the Oracle client and the RADIUS server. Similarly, the RADIUS server passes information between the Oracle server and the appropriate authentication server(s). To secure authentication information during transport, RADIUS converts it to a hash value.
The four components-- Oracle client, Oracle server/RADIUS client, RADIUS server, and authentication server--can reside on the same machine or on separate machines. When the Oracle client and Oracle server reside on the same machine, they share the same sqlnet.ora file.
The following table lists each component and the information it stores.
User authentication can take place in either of two ways:
In the synchronous mode, RADIUS allows you to use various authentication methods, including passwords, SecurID token cards, and smartcards.
Figure 3-2 shows the sequence in which synchronous authentication occurs.
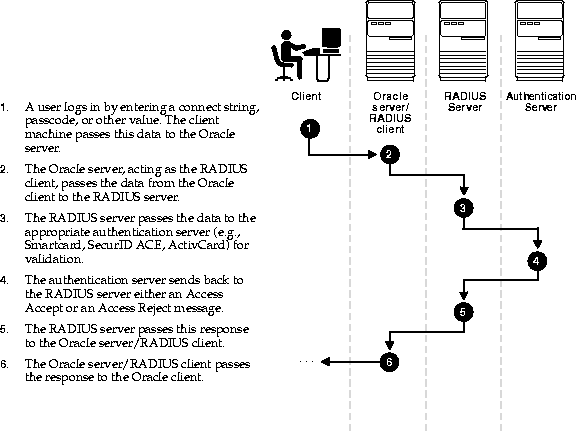
With SecurID authentication, each user has a token card which displays a dynamic number that changes every sixty seconds. To gain access to the Oracle server/RADIUS client, the user enters a valid passcode which includes both a personal identification number (PIN) and the dynamic number currently displayed on his or her SecurID card. The Oracle server/RADIUS client passes this authentication information from the Oracle client to the RADIUS server, and the RADIUS server, in turn, passes it to the authentication server for validation. Once the authentication server (Security Dynamics ACE/Server) validates the user, it sends an "accept" packet to the RADIUS server. The RADIUS server passes this to the Oracle server/RADIUS client, which, in turn, passes it to the Oracle client. The user is now authorized and able to access the appropriate tables and applications.
|
More Information:
For more information on SecurID token cards, see "Authentication Methods Supported" and Chapter 6, "Configuring SecurID Authentication". See also documentation provided by your SecurID vendor. |
Figure 3-3 shows the sequence in which challenge-response, or asynchronous, authentication occurs.
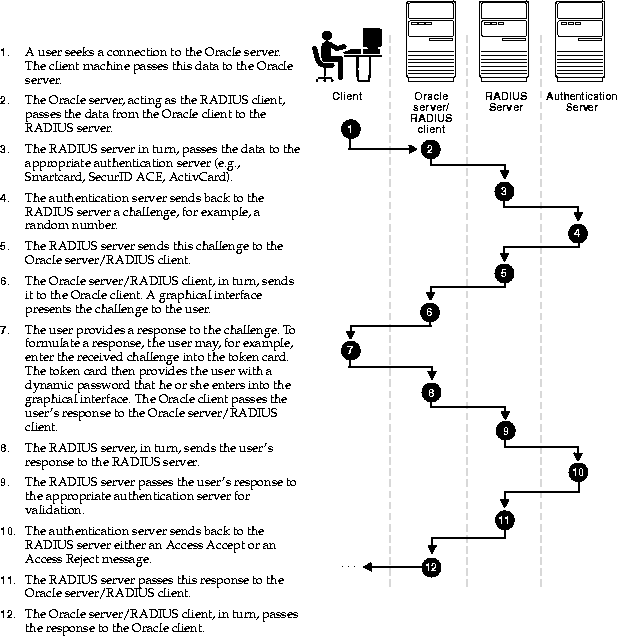
With smartcard authentication, the user logs in by inserting the smartcard--a plastic card (like a credit card) with an embedded integrated circuit for storing information--into a hardware device which reads the card. The Oracle client sends this login information contained in the smartcard to the authentication server by way of the Oracle server/RADIUS client and the RADIUS server. The authentication server sends back a challenge to the Oracle client--by way of the RADIUS server and the Oracle server/RADIUS client--prompting the user for authentication information. That information could be, for example, a PIN as well as additional authentication information contained on the smartcard.
The Oracle client then sends the user's response to the authentication server by way of the Oracle server/RADIUS client and the RADIUS server. If the user has entered a valid number, the authentication server sends an "accept" packet back to the Oracle client by way of the RADIUS server and the Oracle server/RADIUS client. The user is now authenticated and authorized to access the appropriate tables and applications. If the user has entered incorrect information, the authentication server sends back a message rejecting the user's access.
One particular ActivCard token is a hand held device with a keypad and which displays a dynamic password. When the user seeks access to an Oracle server by entering his or her password, the information is passed to the appropriate authentication server by way of the Oracle server/RADIUS client and the RADIUS server. The authentication server sends back a challenge to the client--by way of the RADIUS server and the Oracle server/RADIUS client. The user enters that challenge into the token, and the token then displays a number for the user to send in response.
The Oracle client then sends the user's response to the authentication server by way of the Oracle server/RADIUS client and the RADIUS server. If the user has entered a valid number, the authentication server sends an "accept" packet back to the Oracle client by way of the RADIUS server and the Oracle server/RADIUS client. The user is now authenticated and authorized to access the appropriate tables and applications. If the user has entered an incorrect response, the authentication server sends back a message rejecting the user's access.
To enable RADIUS authentication and accounting, you perform the following general tasks, each of which is explained in the next several pages:
Step 1: Install RADIUS on the Oracle server and the Oracle client
Step 2: Configure RADIUS authentication
Step 3: Add the RADIUS client name to the RADIUS server database
Step 4: Create and grant access to a user
Step 5: Configure RADIUS Accounting
Step 6: Configure the authentication server for use with RADIUS.
Step 7: Configure the RADIUS server for use with the authentication server
Step 8: Create and grant roles
You install the RADIUS adapter along with the Oracle Advanced Security option during a typical installation of Oracle8i.
This section discusses the following topics.
Unless otherwise indicated, you perform these configuration tasks by using the Net8 Assistant or by using any text editor to modify the sqlnet.ora file.
This graphical interface tool makes it easy to set parameters in the sqlnet.ora file and other Oracle8i configuration files.
In the Net8 Assistant's left pane, click the Profile folder. Then go to the drop down list box at the top of the right pane, and select Advanced Security Option. The tabbed pages for the Oracle Advanced Security option appear.
Go to the menu bar and click File > Save Network Configuration.
Set the SQLNET.AUTHENTICATION_SERVICES parameter.
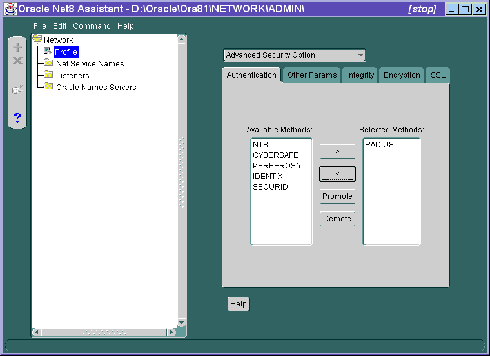
| Use the Net8 Assistant... | ... or modify SQLNET.ORA |
|---|---|
|
Refer to Figure 3-4.
|
SQLNET.AUTHENTICATION_SERVICES=(RADIUS) |
Do the following tasks, each of which is described below.
The SQLNET.AUTHENTICATION_SERVICES parameter sets the authentication method(s) you want to use.
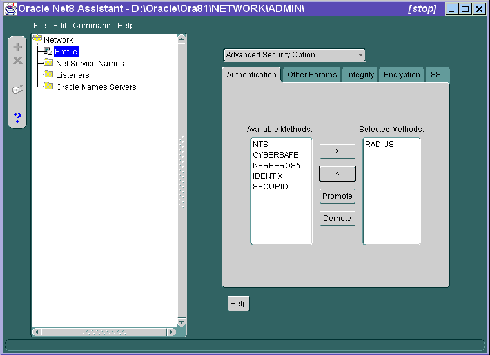
| Use the Net8 Assistant... | ... or modify SQLNET.ORA |
|---|---|
|
Refer to Figure 3-5.
|
SQLNET.AUTHENTICATION_SERVICES=RADIUS) |
The SQLNET.RADIUS_AUTHENTICATION parameter sets the location of the primary RADIUS server. The default is the local host.
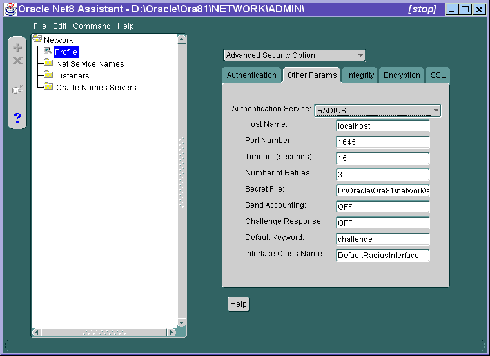
| Use the Net8 Assistant... | ... or modify SQLNET.ORA |
|---|---|
|
Refer to Figure 3-6. |
SQLNET.RADIUS_AUTHENTICATION= |
Configure the file init<sid>.ora which you can find in the directory $ORACLE_BASE\ADMIN\DB_NAME\PFILE. Specify the following values in this file:
REMOTE_OS_AUTHENT=FALSE
OS_AUTHENT_PREFIX=""
|
More Information:
For information on setting initialization parameters on the Oracle server, see Oracle8i Reference and Oracle8i Administrator's Guide. |
If you use the challenge-response authentication mode, RADIUS presents the user with a Java-based graphical interface requesting first a password, then additional information--for example, a dynamic password that the user obtains from a token card. Add the SQLNET.RADIUS_CLASSPATH parameter in the sqlnet.ora file to set the path for the Java classes for that graphical interface.
Use a text editor to add the following parameter to the file sqlnet.ora.
SQLNET.RADIUS_CLASSPATH=path/netradius.jar:path/ewt-opt-3_1_8_1.zip
For example:
SQLNET.RADIUS_CLASSPATH=/ohome/network_src/jlib/

                        netradius.jar:/ohome/network_src/jlib

                        /ewt-opt-3_1_8_1.zip
You can make the following additional RADIUS configurations by using the Net8 Assistant, or by modifying the file sqlnet.ora.
Do this by setting the SQLNET.RADIUS_AUTHENTICATION_PORT parameter. The default is 1645.
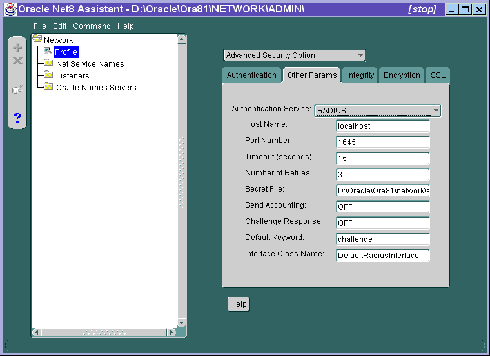
| Use the Net8 Assistant... | ... or modify SQLNET.ORA |
|---|---|
|
Refer to Figure 3-7. |
SQLNET.RADIUS_AUTHENTICATION_ |
Do this by setting the SQLNET.RADIUS_AUTHENTICATION_ TIMEOUT parameter.
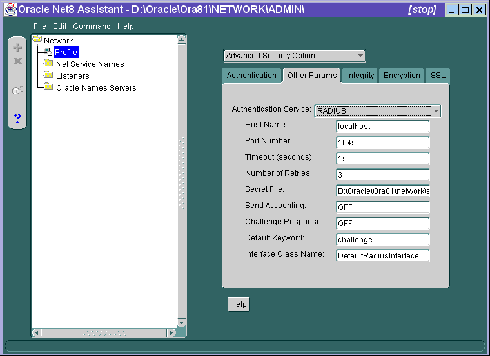
| Use the Net8 Assistant... | ... or modify SQLNET.ORA |
|---|---|
|
Refer to Figure 3-8. |
SQLNET.RADIUS_AUTHENTICATION_ |
Do this by setting the SQLNET.RADIUS_AUTHENTICATION_ RETRIES parameter. The default is 3.
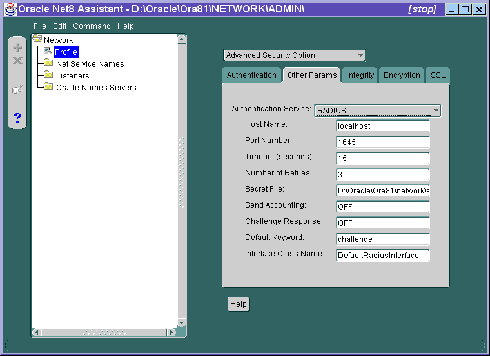
| Use the Net8 Assistant... | ... or modify SQLNET.ORA |
|---|---|
|
Refer to Figure 3-9. |
SQLNET.RADIUS_AUTHENTICATION_ |
|
More Information:
For instructions on configuring RADIUS accounting, see "Step 5: Configure RADIUS Accounting". |
Do this by setting the SQLNET.RADIUS_SECRET parameter.
|
More Information:
For information on specifying the secret key, see "Step 9: Specify the RADIUS secret key on the Oracle server". |
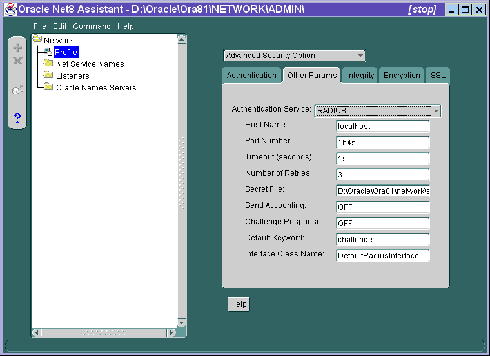
| Use the Net8 Assistant... | ... or modify SQLNET.ORA |
|---|---|
|
Refer to Figure 3-10. |
SQLNET.RADIUS_SECRET=(path/RADIUS.KEY) |
The challenge-response (asynchronous) mode presents the user with a graphical interface requesting first a password, then additional information--for example, a dynamic password that the user obtains from a token card. With the RADIUS adapter, this interface is Java-based to provide optimal platform independence.
|
More Information:
For information on how to customize the challenge-response user interface, see Appendix C, "Integrating Authentication Devices Using RADIUS" |
To configure challenge-response, do the following tasks, each of which is described below:
Set this environment variable to the JRE or JDK location on the system where the Oracle client is to run.
On UNIX:
At the command prompt, type the following:
Unix% setenv JAVA_HOME /usr/local/packages/jre1.1.7B
On Windows NT:
Set the following three parameters in the sqlnet.ora file as described below:
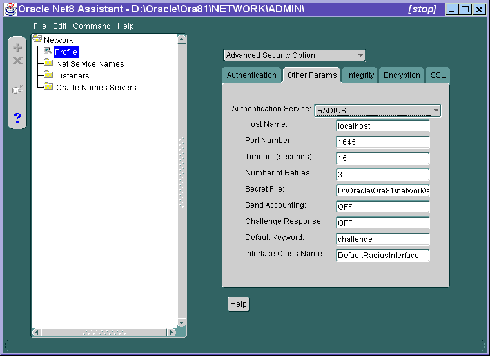
| Use the Net8 Assistant... | ... or modify SQLNET.ORA |
|---|---|
|
Refer to Figure 3-11.
|
SQLNET.RADIUS_CHALLENGE_RESPONSE= SQLNET.RADIUS_CHALLENGE_KEYWORD=(KEYWORD) SQLNET.RADIUS_AUTHENTICATION_INTERFACE=(package_name, delimited by a slash mark (/) rather than by a period (.) and followed by radius_interface_name)
SQLNET.RADIUS_AUTHENTICATION_INTERFACE=vendor/net/ |
If you are using an alternate RADIUS server, set the following parameters in the file sqlnet.ora by using any text editor.
SQLNET.RADIUS_ALTERNATE=(HOSTNAME OR IP ADDRESS OF ALTERNATE RADIUS SERVER)SQLNET.RADIUS_ALTERNATE_PORT=(1645)SQLNET.RADIUS_ALTERNATE_TIMEOUT=(NUMBER OF SECONDS TO WAIT FOR RESPONSE) SQLNET.RADIUS_ALTERNATE_RETRIES=(NUMBER OF TIMES TO RE-SEND TO RADIUS SERVER)
The RADIUS client is your Oracle server. See Figure 3-1.
The clients file on the RADIUS server stores each RADIUS client's name or IP address and its shared secret. The pathname for this file is: /etc/raddb/clients.
@ (#) clients 1.1 2/21/96 Copyright 1991 Livingston Enterprises Inc

This file contains a list of clients which are allowed to make
authentication requests and their encryption key. The first field is a
valid hostname. The second field (separated by blanks or tabs) is the
encryption key.

Client Name                     Key
CLIENT NAME column, enter the client's name or IP address. In the KEY column, enter the shared secret.
You can do this by launching SQL*Plus and typing the following commands:
SQL> CONNECT system/manager@database_name;
SQL> CREATE USER username IDENTIFIED EXTERNALLY;
SQL> GRANT CREATE SESSION TO USER username;
SQL> EXIT
If you are using a Windows NT platform, you can do this by using the Security Manager tool of the Oracle Enterprise Manager.
RADIUS Accounting logs information about access to the Oracle server and stores it in a file on the RADIUS accounting server. You can use this feature only if both your RADIUS server and authentication server support it
To enable or disable RADIUS accounting, you do the following:
Do this by setting the SQLNET.RADIUS_SEND_ACCOUNTING parameter on the Oracle server.
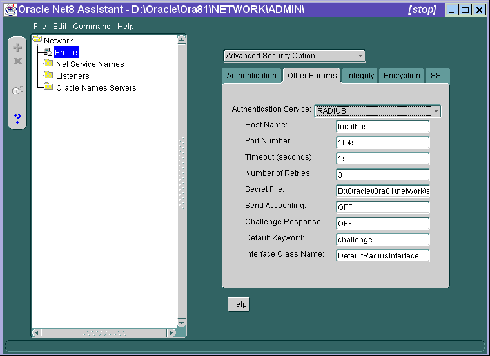
| Use the Net8 Assistant... | ... or modify SQLNET.ORA |
|---|---|
|
Refer to Figure 3-12. |
SQLNET.RADIUS_SEND_ACCOUNTING= ON |
RADIUS Accounting consists of an accounting server residing on either the same host as the RADIUS authentication server or on a separate host.
|
More Information:
For instructions on configuring the authentication server, see the documentation for your authentication server. The section "Related Publications" contains a list of possible resources. |
If your RADIUS server supports vendor type attribute, you can manage roles by storing them in the RADIUS server. The Oracle server downloads these roles when there is a CONNECT request using RADIUS.
To use this feature, configure roles on both the Oracle server and the RADIUS server.
OS_ROLES in the init.ora file on the Oracle server.
IDENTIFIED EXTERNALLY syntax to create on the Oracle server each role you want the RADIUS server to manage.
Create role names with the following format:
ORA_DatabaseName.DatabaseDomainName_RoleName
For example:
ORA_JULIETDB.US.ORACLE.COM_MANAGER
Do this by performing the following tasks:
Using any text editor, open the file radius.key located in the path $ORACLE_HOME/SECURITY. Enter the RADIUS secret key and save the file.
If you are using the synchronous authentication mode, launch SQL*Plus and, at the prompt, type the following:
CONNECT username/password@database_alias
Note that you can log in with this command only when challenge-response is turned to OFF.
If you are using the challenge-response (asynchronous) mode, launch SQL*Plus and, at the prompt, type the following:
CONNECT/@database_alias
Note that you can log in with this command only when challenge-response is turned to ON.